Friday, July 22, 2016

Loaded "Nachos:" Gluten and Soy Free

When Brian and I first started dating, he took me to a Mexican restaurant that I had never been to. I knew then he was a keeper. ;) The food was delicious, so fresh, and became my new favorite restaurant. Okay, okay...I knew Brian was "the one" for many more important reasons than that, but the fact that he loved Mexican food as much as I did thrilled me to no end. It's funny to admit that was one of the small/insignificant things that I had secretly hoped for in my future husband. I would joke around when I was a kid and say that I would have a queso fountain at my wedding, rather than a "romantic" chocolate fountain. Don't worry: when the time came to say "I do," we didn't have any food fountains at our wedding. I didn't want our chic barn wedding to look like we belonged in the barn. 

Brian and I have been married for nine months now (that's so crazy!), and I cook Mexican food for us at least once a week. It's delicious, easy and quick to prepare, and can be made healthier than the food we order at our favorite Mexican restaurant.

Yesterday, I decided to modify a nacho recipe I found on Pinterest so that it would follow my diet restrictions: no gluten or soy. So, here it is!


Loaded "Nachos" 

Ingredients

Two large bell peppers (the larger, the better)
1/4 lb ground beef
1/4 pack of taco seasoning (Publix brand is soy and gluten free)
3/4 cup Mexican rice with corn (Vigo brand is soy and gluten free)
1/2 cup black beans 
1/2 can mild Ro-tel 
1/4 cup chopped onion 
1 tablespoon olive oil 
1/2 cup shredded Mexican cheddar cheese  
1/4 teaspoon of cayenne pepper 
Sour cream (optional topping) 
Fresh cilantro (optional topping)

Note: this recipe serves two people. 

Instructions

Heat oven to 400 degrees. Using a medium sized frying pan, sauté the chopped onion in olive oil on medium heat until the onion is translucent. 
While the onions are sautéing, cook the rice according to the package instructions. The brand of rice pictured below tastes like authentic Mexican rice, and as a bonus, it's soy free! It's rare to find soy free rice at the grocery store. Once cooked, set aside. 
Pour water into a baking dish (just enough to cover the bottom of the dish). Slice bell peppers vertically along the natural pepper "lines" to create small bowls. Line the peppers skin down in a baking dish. 
When the oven is heated, cover the pepper dish with foil and bake for 15 minutes. This allows the peppers to steam and soften. 

While the peppers are steaming in the oven, add ground beef to the pan with the sautéed onions and cook on medium heat until well done. Next, mix the taco seasoning and cayenne pepper in with the beef. If using canned black beans drain the water, measure 1/4 cup of beans, and add to the ground beef pan. Measure 3/4 cup of the cooked Mexican rice and add to the ground beef pan. Drain water from the Ro-tel can. Add 1/2 of the can to the ground beef pan. Mix all of the ingredients together to form the loaded part of the nachos. 
Once the peppers are steamed, take them out of the baking dish and briefly set aside. Carefully pour any remaining water out of the dish. Place peppers back in the baking dish skin down. 

Reduce the oven heat to 375 degrees. Spoon the nacho mixture into each bell pepper bowl. Top each pepper bowl with shredded cheese. 


Place the peppers back in the oven for an additional five minutes to melt the cheese.
Optional: top with fresh cilantro and sour cream. 

Dig in! 

Monday, July 18, 2016

Red Lobster's Cheddar Biscuits: Gluten, Soy, and Egg Free!


I have been craving Red Lobster's cheddar biscuits lately. They are so cheesy, garlicky, and melt in my mouth. However, due to my diet restrictions I knew I couldn't eat the restaurant box mix that is available for purchase at my local grocery store. So I decided to create my own recipe. I was pleasantly surprised with how well the biscuits turned out! You obviously can't beat the "real" Red Lobster biscuits but these are a darn good alternative, especially considering they are allergy-friendly (gluten, soy, and egg free). The biscuits also paired so well with our dinner tonight, baked tilapia. Yumm! 
Here's the recipe:

Ingredients

  • 3/4 cup of water
  • 4 1/2 tablespoon of vegetable oil
  • 1/2 tablespoon of soy free butter, melted 
  • 1/2 cup of shredded cheddar cheese
  • 1/2 teaspoon dried parsley
  • 1/2 teaspoon garlic powder
  • 1 1/2 cup Bob's Red Mill Gluten Free 1-to-1 Baking Flour 
  • 2 1/4 teaspoon baking powder
  • 1/2 teaspoon of salt

Instructions

Heat oven to 450 degrees. In a medium size mixing bowl, whisk together flour, parsley, garlic powder, baking powder, and salt. Next, add water and vegetable oil. Using a spatula, gently mix together until combined. Add shredded cheese and mix into the dough. Don't over mix or the biscuits will be tough. Using a greased baking sheet, spoon dough evenly onto the pan until 10 small biscuits are formed. Using a cooking brush, top each biscuit with melted butter. Sprinkle additional salt on each biscuit (just enough to taste). Bake for approximately 10 minutes and enjoy! 
The moral of the story? Don't be afraid to create your own recipes. Yes, you will fail sometimes but you'll learn from your mistakes and will improve each time. 


Monday, July 11, 2016

No-Bake Granola Bars: Only Four Ingredients!


Breakfast is the most important meal of the day. We all know that but we don't always have time to sit down to a healthy meal. Sometimes, it's all about convenience and grabbing food at a fast food restaurant. For those of us who avoid gluten and soy, it can be challenging to grab something on the go because our food options are so limited. These gluten free no-bake granola bars are perfect for busy mornings, a mid-afternoon snack, or even parties. Once they are prepared, all you have to do is grab one or two out of the fridge and start your day, hassle-free! And, they only take 10 minutes to prepare.   


Ingredients:
1. 2 cups of quick cooking oats2. 1 cup of nut butter of choice (I used peanut butter.)3. 1/2 cup of mixed nuts and dried berries4. 1/2 cup of honey*Optional: a dash of cinnamon and 1/4 cup of soy free chocolate chips (Enjoy Life chocolate chips are the best.) 
Instructions:
1. In a food processor, gently chop mixed nuts and berries until they are bite size (could also chop nuts with a mezzaluna or a knife). 

2. Mix all ingredients (and optional ingredients) in a large mixing bowl.
3. Line muffin pan with muffin liners. 

4. Spoon mixture into the muffin liners. Fill each cup 3/4 full. 
5. Refrigerate. 
6. Once the no-bake bars are set, they can be taken out of the muffin pan and placed in a Ziplock bag or a storage container. Be sure to keep them refrigerated, especially in the heat of summer. Enjoy!

J. Alexander’s Chicken Pasta Soup Recipe — Gluten and Soy Free!

One of my favorite date night meals is at J. Alexander’s. You can’t go wrong with anything on the menu, but my favorite item is the chicken pasta soup. The soup is creamy, hearty, and has lots of veggies.Technically, this soup is an appetizer but it’s so filling that I used to eat it as a meal. Plus, it’s one of the cheaper items on the menu coming in at $10. I’d say that’s a good deal for great soup at a fancy and relaxing restaurant.
My heart initially sank when I realized I could no longer have this soup. But, I’m here to tell you that I have created an alternative recipe that is just as decadent and is gluten free!

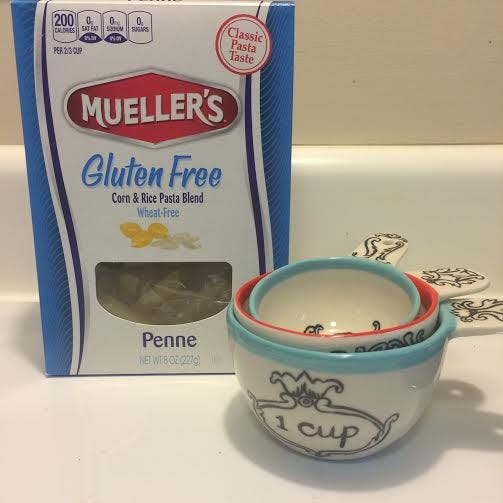
I’ve always been a fan of Mueller pasta noodles and was excited to discover their line of gluten free products. I purchased a box of gluten free penne noodles at my local Publix store that was half-off (score!). These noodles taste so similar to regular penne.


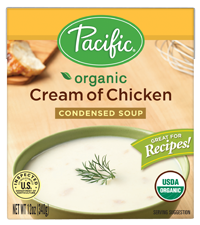
My mom found gluten free cream of chicken soup, also at our local Publix store, and bought it so I could try it. It was a little different than the canned soup I was used to cooking with but it was surprisingly good. It’s healthier, too.


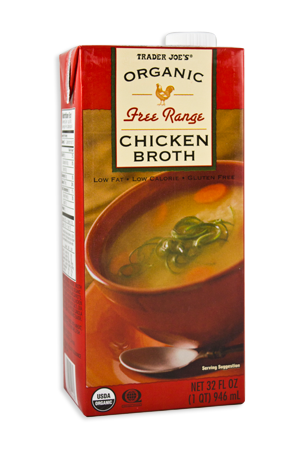
I used Trader Joe’s organic and gluten free chicken broth. I think it’s one of the best broths you can cook with.


http://traderjoes.com/fearless-flyer/article/1277

All other ingredients used in the recipe are naturally gluten free. I hope you enjoy this soup as much my husband and I did! I will definitely be making this often.

Here's the recipe:
Ingredients
  • 3 tablespoons olive oil
  • 1 cup thinly sliced celery
  • 1 cup thinly sliced baby carrots
  • 1 cup peas, frozen or fresh
  • 1/2 medium onion, chopped finely
  • 6 cups gluten free chicken broth, divided into 2 and 4 cups
  • 2 tablespoons chopped parsley
  • 1/2 pound boneless/skinless chicken breasts, cut into 1/2-inch pieces
  • (2) 12 oz. boxes of cream of chicken soup, gluten free
  • 3/4 cup water
  • 3/4 cup of 2% milk
  • 1 box gluten free penne pasta
  • Salt and fresh ground pepper to taste
Instructions
  1. Using a medium sized pot, sauté olive oil, onions, celery, and carrot slices over medium heat for 5–10 minutes until veggies are tender (cook time depends on using a gas or electric stove top). While sautéing the veggies, boil the chicken in a separate pot until it’s fully cooked (Suggestion: pour 2 cups of gluten free chicken broth over the chicken and pour water into the pot until it is half full. The broth makes the chicken more flavorful. Once the chicken is fully cooked, drain and set aside). *Optional: shred chicken into smaller bites. This isn’t necessary but I prefer smaller bites in soup.
  2. Once the veggies are sautéed, pour the remaining 4 cups of gluten free chicken broth into the veggie pot. Turn the heat down to medium low.
  3. Add (2) 12 oz. boxes of gluten free cream of chicken soup, 3/4 cup of 2% milk and 3/4 cup of water. Whisk liquids for 1–2 minutes until they are all combined. Add additional water if needed.
  4. Add peas, parsley, salt and fresh ground pepper to taste.
  5. Place lid on pot and let the soup simmer for approximately 30 minutes on medium low. Stir occasionally.
  6. Boil 1 box of gluten free penne pasta noodles according to the package instructions. Set aside.
  7. After the soup has simmered add the penne noodles and chicken to the pot. Stir until ingredients are all combined. Note: gluten free noodles are notorious for becoming mushy if they are cooked too long, hence adding them at the last minute. You definitely don’t want the noodles to simmer for 30 minutes with the soup. Been there, done that.
*Optional: let soup simmer for an additional 5–10 minutes to let the noodles and chicken soak up the juices. It is worth the wait!

Gluten Free Biscuits — That are Actually Delicious!

I’ve had to recently take the southern cooking skills I’ve learned from my mom and modify them for my new lifestyle change: a gluten and soy free diet in an attempt to help slow down the growth of Endometriosis and to help relieve my constant pain and inflammation.
Gluten and soy are in so many foods, especially in the foods I love, and I’m doing the best I can to adapt to this new change. However, I’ve realized that this lifestyle can be done. There are so many products and brands in most grocery stores that are allergy-friendly and that seems to make the change a bit easier.
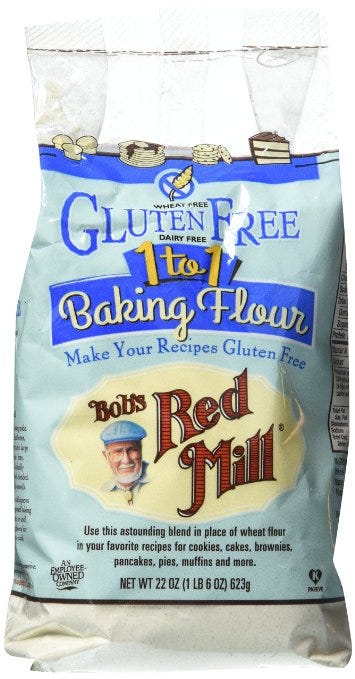
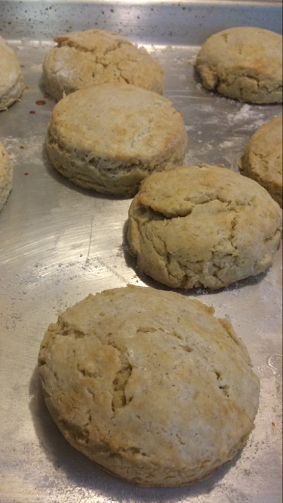
My first product recommendation is Bob’s Red Mill Gluten Free 1-to-1 Baking Flour. I decided to make biscuits using the recipe located on the packaging but was skeptical because I couldn’t imagine a vegan biscuit actually tasting good!

http://www.bobsredmill.com/gluten-free-1-to-1-baking-flour.html

When the biscuits were hot out of the oven, I couldn’t wait until dinner to try one. I had to “make sure” they were edible for Brian and I to devour with our meal.


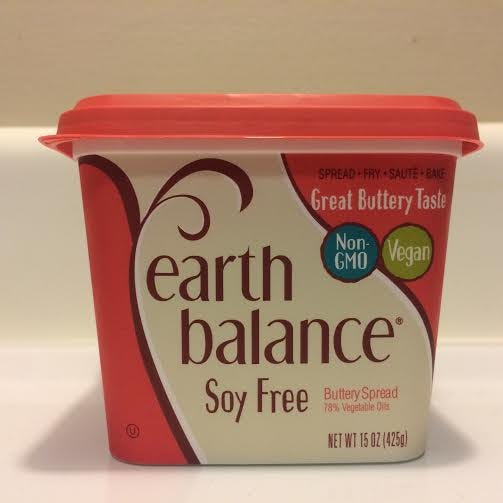
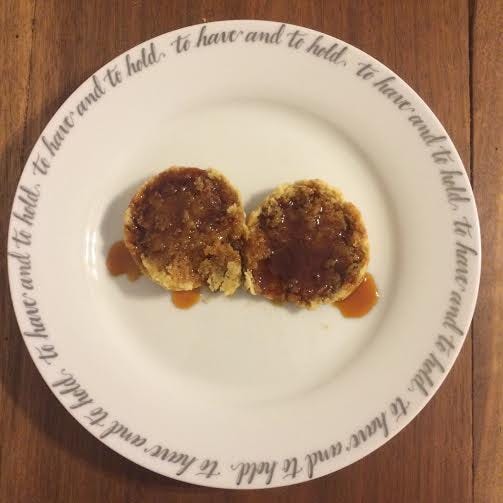
I spread earth balance soy free butter on my biscuit, another recently discovered great product, and let it melt for a few seconds.


Next, I got a heaping spoonful of my beloved sorghum and topped it on my biscuit. If you’re not familiar with sorghum, you’re missing out! It’s similar to molasses or maple syrup but it may be considered an acquired taste. I grew up eating it with my biscuits, so of course I’m a fan! It also has a lot of health benefits.


Once I took a bite, I was hooked. The biscuits were surprisingly delicious and were probably the best store-bought biscuits I’ve ever had. I could hear the “Hallelujah Chorus” echoing from Heaven. These biscuits gave me hope for my southern foodie soul.

About Me

Hi, folks!
My name is Beth and I enjoy cooking, couponing, crafting, being in the great outdoors, spending time with family and friends, traveling, and doing life with my sweet husband and best friend, Brian.
The purpose of this blog is to share delicious recipes that are allergy-friendly (mostly gluten and soy free), share my opinions and recommendations on allergy-friendly brands and products, offer couponing tips, and to provide encouragement for women who also have been diagnosed with Endometriosis.
Thank you for stopping by!
Disclaimer: all information provided in this blog are my opinions or research findings. If you believe you have Endometriosis, seek medical assistance for diagnosis and treatment. I cannot guarantee that all recipes are 100% gluten and soy free. Certain gluten and soy free products I use have a disclaimer on the packaging stating that cross-contamination could occur during packaging of the product.